Turning your outdoor area into a beautiful spot with travertine pavers is a fun DIY task. You just need the right tools and a little patience. Then, you can make your space look great and last long.
Putting in travertine pavers needs careful planning and doing. This guide will show you how to do it, from start to finish. If you’re not sure about something, it’s okay to ask for help. For a FREE Estimate, CALL NOW 650-418-2241 or visit https://hillsboroughmasonerypros.com.
Key Takeaways
- Prepare your outdoor space for travertine paver installation.
- Understand the necessary tools and materials required.
- Follow a step-by-step guide for a successful DIY project.
- Consider seeking professional help if needed.
- Ensure proper execution for a durable and beautiful result.
Introduction to Travertine Pavers
Travertine pavers are made from natural limestone. They are perfect for patios, walkways, and pool decks. These pavers are not only beautiful but also very durable.
What are Travertine Pavers?
Travertine pavers come from travertine stone, a type of limestone. This stone is formed when calcium carbonate settles. This process makes travertine look unique, with special patterns and colors.
Using travertine pavers can make your outdoor space look better and more valuable.
Benefits of Using Travertine
Travertine pavers have many benefits for outdoor projects. Some of these benefits are:
- Durability: Travertine pavers can handle different weather conditions well.
- Aesthetic Appeal: Their unique looks and colors make any outdoor area elegant.
- Low Maintenance: With the right seal, travertine pavers are easy to keep up.
Common Applications for Travertine
Travertine pavers are great for many outdoor uses. Here are a few examples:
| Application | Description |
|---|---|
| Patios | Create inviting outdoor living spaces with travertine pavers. |
| Walkways | Use travertine pavers to design beautiful and durable walkways. |
| Pool Decks | Travertine pavers are ideal for pool decks due to their slip-resistance and heat tolerance. |
For professional installation of travertine pavers, get expert help. For a FREE estimate, CALL NOW 650-418-2241 or visit https://hillsboroughmasonerypros.com.
Tools and Materials Needed
To do a great job with travertine pavers, you need the right tools and materials. This is key for a DIY Patio Pavers project. It helps make your Outdoor Travertine Paver Installation look beautiful and last long.
Essential Tools for Installation
The right tools make a big difference in how well your installation goes. Here are some tools you’ll need:
- Shovel: For digging and moving soil or sand.
- Trowel: Useful for applying and spreading materials like sand or cement.
- Level: Ensures that your surface is even and properly aligned.
- Rubber Mallet: Helps in tapping pavers into place without damaging them.
Types of Travertine Pavers
Travertine pavers come in different types, each with its own look and feel. Your choice depends on what you want your space to look like and how it will work.
| Type | Description | Use Case |
|---|---|---|
| Filled Travertine | Pavers with holes filled with a colored material. | Ideal for a uniform look. |
| Unfilled Travertine | Pavers with natural holes and imperfections. | Suitable for a more rustic appearance. |
| Tumbled Travertine | Pavers with a worn, aged look. | Perfect for creating a vintage or antique effect. |
Additional Materials Required
You’ll also need other materials for your project. These include:
- Sand: Acts as a base material and for filling joints.
- Cement: Used for creating a stable base or for certain types of installations.
- Joint Filler: Material used to fill the gaps between pavers.
If you’re not sure about anything, it’s a good idea to talk to professionals. For a FREE Estimate, CALL NOW 650-418-2241 or visit https://hillsboroughmasonerypros.com.

Preparing the Site for Installation
Getting your travertine pavers ready is key to a beautiful and lasting look. This means doing a few important steps. These steps make your outdoor space look good, safe, and useful.
Assessing the Area
First, check the spot where you’ll put the pavers. Look for dirt, uneven spots, or water problems. Notice any slopes or where water gathers. Knowing your land helps you plan better.
Clearing and Leveling the Ground
Next, clean the area of dirt, plants, and blocks. Then, make the ground even for a solid base. You might need to take out soil or add some to get it right. A level ground stops pavers from moving or sinking.
Ensuring Proper Drainage
Drainage is key to stop water from harming your pavers.
“A good drainage system keeps your pavers safe for a long time.”
You might need to change the yard’s slope or add a drainage system. This keeps water away from your pavers.
For a pro job and the right installation, think about getting help. For a FREE estimate, CALL NOW 650-418-2241 or visit https://hillsboroughmasonerypros.com.
Laying a Stable Base
How long your travertine pavers last depends on a solid base. A good base keeps your pavers level and looking great. It’s key for a DIY travertine paver job.
Choosing the Right Base Material
Picking the right base material is the first step. Gravel or crushed stone are top choices. They drain well and support the pavers and any weight.
Think about your area’s weather and soil. In wet places, pick a material that drains well to avoid water under the pavers.
| Base Material | Drainage Capability | Load-Bearing Capacity |
|---|---|---|
| Compacted Gravel | Excellent | High |
| Crushed Stone | Good | High |
| Sand | Fair | Moderate |
How to Compact Your Base
Compacting the base is key for a solid surface. Use a hand tamper for small spots or a plate compactor for big areas.
Compaction Tips: Wet the base a bit before compacting. This helps the material settle better. Make several passes to get it dense.
Adding a Bedding Layer
After compacting, add a sand layer. It levels the surface and smooths it for pavers. Level the sand well.
For a pro look, screed the sand to about 1 inch. This makes a flat base for your pavers.
For a FREE estimate or to schedule your travertine paver installation, CALL NOW 650-418-2241 or visit https://hillsboroughmasonerypros.com.
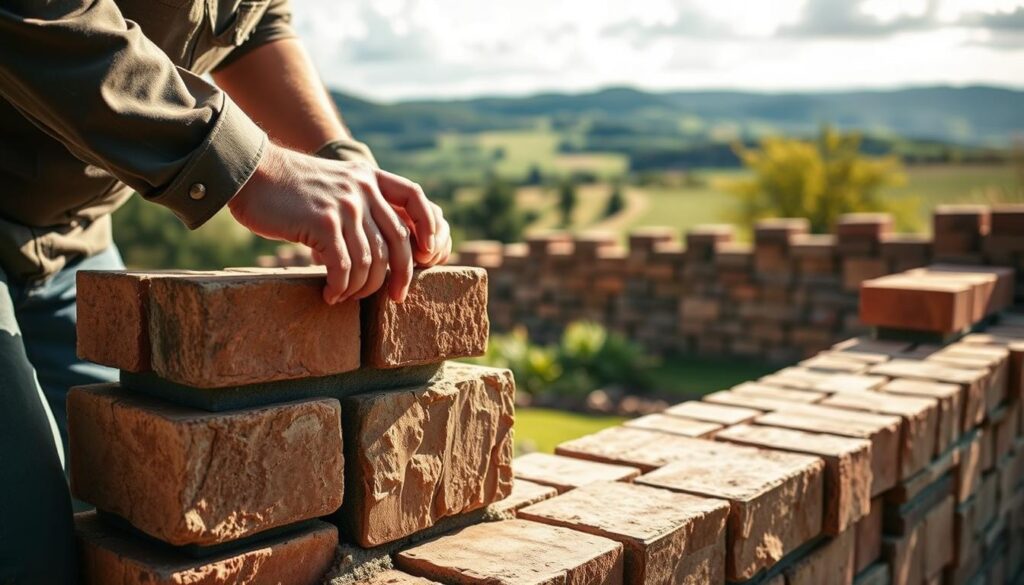
Laying the Travertine Pavers
Laying travertine pavers is a careful process. It needs patience and focus. This step is key to a beautiful and lasting outdoor area.
Starting the First Row
First, find where to start. It’s usually along the longest straight edge or a big feature. Make sure the first row is straight and even. This helps the rest of your pavers look good.
Tip: Use a string line to help place your first row. This keeps it straight.
Patterns for Laying Pavers
Travertine pavers can be laid in many ways. You can choose running bond, herringbone, or a simple grid. Pick a pattern that fits your space and taste.
Tips for Spacing and Alignment
It’s important to keep the spacing and alignment even. Use spacers to make sure the gaps are the same.
| Paver Pattern | Spacing Recommendation | Alignment Tip |
|---|---|---|
| Running Bond | 1/4 inch | Stagger joints for stability |
| Herringbone | 1/8 inch | Use a guide for 90-degree angles |
| Grid Pattern | 1/4 inch | Maintain consistent joint spacing |
For a professional look, check the alignment often and adjust if needed. If you’re not sure, get help from a pro. For a FREE estimate, CALL NOW 650-418-2241 or visit https://hillsboroughmasonerypros.com.
Cutting Travertine Pavers
To get a pro look with your outdoor travertine paver setup, you must learn to cut pavers well. Cutting travertine pavers needs precision and the right tools. This ensures a clean cut and keeps the stone safe.
Tools for Cutting Pavers
To cut travertine pavers right, you need the right tools. The most common tools are:
- Wet Saw: Great for straight cuts in travertine pavers. It uses a diamond blade and water to cool it, cutting down dust.
- Tile Nippers: Good for cutting small pieces or making curved cuts in travertine pavers.
- Chisel and Hammer: Useful for scoring and breaking pavers. This is good for a more rustic look.

Step-by-Step Cutting Guide
Here’s how to cut travertine pavers with a wet saw:
- Measure and Mark: Measure the paver to the size you want and mark it with a pencil.
- Set Up the Wet Saw: Make sure the wet saw has a diamond blade good for cutting travertine.
- Cut the Paver: Slowly push the paver through the saw, keeping your hands away from the blade.
- Inspect and Clean: Check the cut edge for chips or damage and clean the paver.
Safety Precautions While Cutting
When cutting travertine pavers, safety is key. Here are some safety tips:
- Wear Protective Gear: Use safety glasses, gloves, and a dust mask to protect yourself from debris and dust.
- Keep the Work Area Clean: Make sure the work area is clear of clutter to prevent accidents.
- Follow Manufacturer’s Instructions: Always follow the manufacturer’s instructions for the wet saw and other tools.
For a pro finish and safety, get help or hire a pro if unsure. For a FREE Estimate, CALL NOW 650-418-2241 or visit https://hillsboroughmasonerypros.com.
Filling Joints Between Pavers
Filling the gaps between your travertine pavers is key. It keeps things stable and looks good. It stops weeds, keeps sand in place, and makes your pavers stronger.
Choosing Joint Filler Material
What you use to fill the gaps matters a lot. You can pick from:
- Polymeric Sand: It hardens with water, stopping weeds and bugs.
- Sand: It’s another choice, but it might need more care because it can get washed away.
How to Fill the Joints
Filling the gaps is easy but needs care. Here’s how to do it:
- Clean the pavers of dirt.
- Spread the chosen filler into the gaps and sweep it in.
- Make sure the gaps are filled right.
- If using polymeric sand, water it to start the binding.
- Wipe off extra filler from the pavers.
Tips for a Neat Finish
For a clean look, follow these tips:
- Compact the sand lightly to settle it right.
- Avoid overfilling to prevent unevenness.
- Check the joints after the first rain or after misting polymeric sand to see if they’re filled right.
If you’re not sure, get help from a pro. For a FREE estimate, CALL NOW 650-418-2241 or visit https://hillsboroughmasonerypros.com.
Sealing Your Travertine Pavers
Sealing your travertine pavers is very important. It keeps them looking good and lasting longer. After you put in your pavers, a sealant helps protect them from stains and damage.
Why Sealing is Important
Sealing travertine pavers is key because it:
- Keeps stains from spills and dirt away
- Helps prevent damage from water and moisture
- Makes the pavers’ color and texture pop
- Makes cleaning easier by pushing dirt away
Sealing your pavers means they stay in great shape. This saves you money on repairs or new pavers.
Choosing the Right Sealant
Choosing the right sealant depends on a few things. These include the type of travertine, the finish you want, and how much protection you need. There are two main types: topical and penetrating.
Topical sealants sit on the surface. They protect against stains but can change how your pavers look. Pick one that fits your finish.
Penetrating sealants go into the stone. They protect from inside without changing how your pavers look. They’re great for keeping the natural look of travertine.
Application Tips for Sealant
Before you apply sealant, make sure your pavers are clean and dry. Here’s how to do it:
- Read the sealant’s instructions first.
- Test it on a small area to see if it changes color or texture.
- Use a roller or brush to apply it evenly, as the instructions say.
- Let it dry before you walk on the pavers or let them get wet.
For a professional job and to keep your pavers looking great, talk to experts. For a FREE estimate, CALL NOW 650-418-2241 or visit https://hillsboroughmasonerypros.com.
Maintenance Tips for Travertine Pavers
To keep your travertine pavers looking great, you need to take care of them. Regular care keeps them beautiful and strong. If you’ve installed Outdoor Travertine Paver Installation or want to keep your pavers in good shape, these tips will help.
Regular Cleaning Practices
Keeping your travertine pavers clean is important. Sweep or blow leaves off to stop them from scratching. For deeper cleaning, mix mild detergent with water. Don’t use harsh cleaners that can harm the travertine.
For tough stains, use a soft-bristled brush to gently clean. Then, rinse with clean water to get rid of soap.
Protecting Against Stains
Travertine can stain easily because it’s porous. Use a sealant to protect your pavers. Pick a sealant made for travertine and follow the instructions.
Act fast when spills happen. Use a clean cloth or paper towel to soak up spills. For oil spills, use a poultice to remove the stain.
| Stain Type | Immediate Action | Follow-Up |
|---|---|---|
| Oil-based | Blot with a clean cloth | Apply a poultice |
| Water-based | Blot with a clean cloth | Rinse with clean water |
Seasonal Maintenance Advice
Seasons change, and so do the needs for travertine paver care. In winter, avoid salt and chemicals. Use sand instead. In spring, check for winter damage and fix it right away.
For a FREE Estimate or to schedule a maintenance check, CALL NOW 650-418-2241 or visit https://hillsboroughmasonerypros.com. Taking good care of your travertine pavers is important. This is true whether you installed them yourself or had professionals do it.
Troubleshooting Common Installation Issues
Even with careful planning, travertine paver installation can go wrong. This leads to problems that need quick fixes. Knowing how to solve these issues is key for a successful DIY patio paver project.
Uneven Pavers
Uneven pavers can ruin your outdoor space’s look and safety. First, find out why they’re uneven. It might be an uneven base, wrong sand layer, or settling.
- Check the base: Make sure it’s compact and even.
- Adjust the sand layer: Add or remove sand to level the pavers.
- Reset pavers: If needed, take them out and put them back to get an even surface.
Shifting or Settling Problems
Travertine pavers can shift or settle. This is often because of soil settling or a bad base. To fix it, you might need to re-compact the base and reset the pavers.
- Remove the affected pavers.
- Re-compact the base material.
- Reset the pavers, making sure they’re spaced right and aligned.
Fixing Cracks and Chips
Cracks and chips in travertine pavers can be fixed. For small damages, use a travertine repair compound.
Repair Steps:
- Clean the damaged area well.
- Apply the repair compound, following the maker’s instructions.
- Let the compound dry fully before sealing the pavers.
If you’re dealing with big problems or aren’t sure what to do, get professional help. For expert help with your travertine paver installation, CALL NOW 650-418-2241 or visit https://hillsboroughmasonerypros.com for a FREE Estimate.
| Issue | Cause | Solution |
|---|---|---|
| Uneven Pavers | Uneven base, improper sand layer | Adjust sand layer, reset pavers |
| Shifting/Settling | Soil settlement, inadequate base | Re-compact base, reset pavers |
| Cracks/Chips | Wear and tear, accidental damage | Use travertine repair compound |
Get Help from Professionals
This DIY Guide helps you install travertine pavers step by step. But, sometimes you need professional help. Installing travertine pavers can be tricky. If you’re not sure about anything, it’s best to ask experts.
When to Call a Professional
Call a pro if your project is big or complex. Or if you’re not sure about installing. Experts can handle tricky designs and uneven ground.
Benefits of Hiring Experts
Experts make sure your travertine pavers look great. They save you time and money too. They have the right tools and know-how to do the job well.
For a stress-free installation, find a good masonry service. For a FREE Estimate, CALL NOW 650-418-2241 or visit Hillsborough Masonry Pros to start your project.